I've moved! New blog address.


My new website + blog is emilyneuburger.com.  Please visit me there!

If you have this site bookmarked in a blog reader, you'll want to switch to emilyneuburger.com.

Thanks, and see you in my new space!

xo emily
Showing posts with label remake. Show all posts

Garden Party Bunting

This past weekend, we had a garden party birthday celebration for my mother. She turned an important number with a five in it, and we decided we needed to infuse some celebration into a year and a half that has been, at times, bumpy.
And, so there we were with the bright sun, family and friends that we adore, plentiful food and drink, and chatter that drifted into the breeze.  The day reminded me of one of my favorite books, All in a Day.  All you have is this day, this moment, and we can find our way home whenever we wish.
In order to bring color and cheer into the day, I sewed a few paper buntings to string about the yard and porch.  It is quite simple and quick to do, and they really did make the day feel extra special.

Materials:  
brown paper bags
cardstock
paint & brushes
scissors
sewing machine (or hole punch and yarn)

Step 1 : Cut the bags open and paint the inside, blank part of the bags.  Use a few different colors.
Step 2 : Make a triangle template for tracing using the cardstock.

Step 3 : Use the template to trace triangles onto the printed part of the bag, and cut out.
Step 4 : Using your sewing machine on a straight stitch, gently sew nothing for about 6 inches.  This will give you a nice, thin cord for hanging your bunting.  
Step 5 : Feed the first triangle under the foot, and sew.  Sew nothing again for 2 or so inches (adjust spacing according to your design) and then feed the next triangle under the foot. Continue until you have the completed bunting. 

Step 6 : When you are finished sewing triangles, sew nothing again for another 6 inches.  This will be the other end of the bunting.

Note : Those of you without sewing machines can use yarn and a hole punch to string your bunting!  Don't let the sewing part stop you.

Step 7 : Make loops at both ends for hanging.

This bunting will turn any old day into a fancier day.   Sometime we need that kind of transformation, yes? 


xo e


Sparkly Star Garland


 Sparkly
 Stars
 Shine

This is a super simple garland tutorial that will make your home quietly sparkle.  The glittery package paper seems to be the just-right amount of sparkle for me.  

Materials:
brown paper bag
gold or silver glitter paint (I used FolkArt Extreme Glitter)
star template (hand drawn is fine)
pencil
scissors
mini pompoms
needle
thread
glue

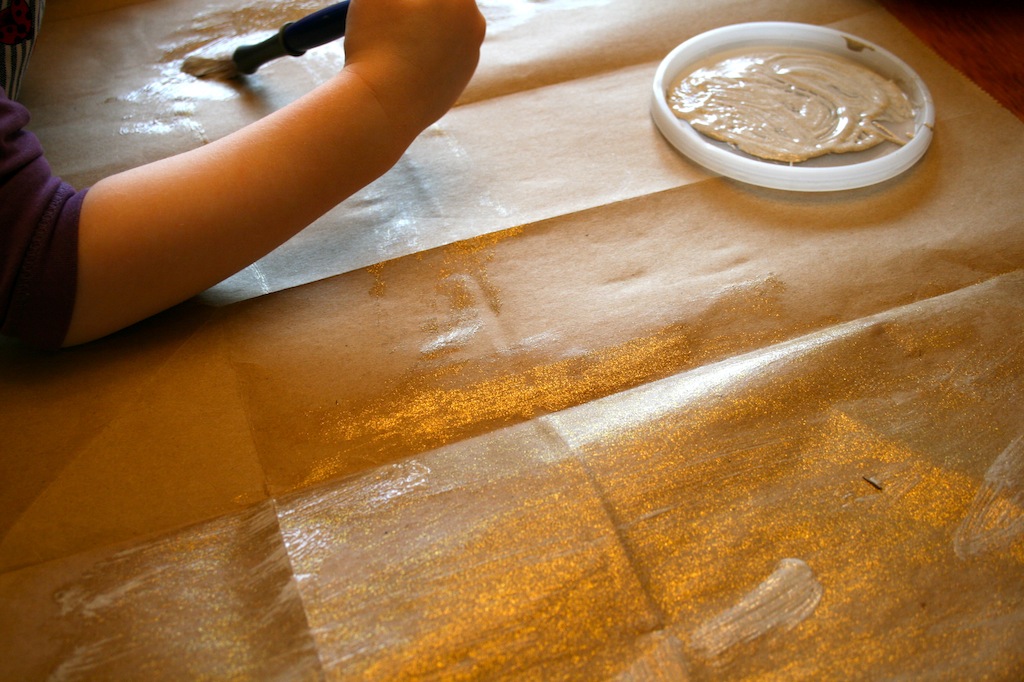
1.  Cut open the paper bag and paint the plain side with the glitter.  I used paint that just added gold glitter rather than paint that was an actual color.  This makes the glitter and color a bit more subtle, but if you are looking for something a bit more punchy, then I think gold paint would be great.  As I mentioned the other day, I was inspired by my friend Catherine's garland and she used gold paint.
It isn't everyday that Mouse gets to paint with glitter.  Fancy pants.

2.  Once it is dry, draw stars on the non-painted side, and then cut them out.
3. Gather pompoms, stars, thread and needle in preparation for stringing.
 
4. Thread the needle with thread (no need for a knot).  First thread a pompom, then a star, then another pompom.......in that order until all are threaded and you've ended with a pompom.
*Notes on threading the stars:  So they won't flip forward, thread a little bit above the center of the star.  Place the needle into the front of the star and then out through the back in order to hide the thread behind the star.

5.  Spread the garland on the floor, glitter side down, and space the stars and pompoms as you'd like them to hang.  Place tape or little dots of glue on the backsides of the stars to keep the thread in place.

We hung ours high over our fireplace and the gold stars shimmers with the light of the fire.  

Our tree is in.
Our stars are in.
Our hearts are still a little bit outside. (the bright sunshine calls to us)

xo e


notebook


I have a thing for notebooks. I've covered plain notebooks with fancy paper and repurposed paper and I've collaged on them with felt and bits of fabric. And, just recently, we made a boatload of hand tied storybooks.

Notebooks mean that bits of information, bits of the present, are being hand recorded with lines and twists and tiny drawings. When I read a page in an old notebook, I see our Chinese food order next to a phone number of a friend next to a craft idea next to our weekend chore list next to a poem next to a score tally next to a packing list. These are tiny stories that make a boat load of sense to me.


After making the stack of rainbow storybooks the other week, I was itching to make more. This time around, I was hanging out with my Moleskine notebook and I was loving up the curved shape, the delicate stitching, the flexible feel, so I decided to make my own out of cereal box and recycled paper. I was going for the general Moleskine shape while fully embracing the handmade, made-from-a-box quality.

The spring The Paper Source catalog arrived the other morning in the mail, and I was inspired by the sunshine-y flowers and spring colors.

I used a mini shredded wheat box because I like mini shredded wheat, but you can use any kind of box. Cut a 10" x 7" piece of the cereal box (or any size you like), fold it in half and crease it with a bone folder, and snip the edges with a corner rounding punch (or leave them nice and pointy). Spray the outside with an adhesive (or use a thin layer of craft glue), and press one piece of catalog paper onto the front and one on the back. If you want front and back to be the same paper, then just cut one long piece. Smooth the paper with your hands and then also with the bone folder to be sure that there aren't any wrinkles or air bubbles. Lay it in a sunny patch on a table to dry for a few hours (mmmmm. sun beams). Cut a stack of recycled paper (mine was 9 1/4" x 6 1/4") so that it is a bit smaller than the cereal box cover. Fold the paper in half, making a sharp crease with the bone folder, and set it aside. Once the adhesive is dry, trim the edges off of the paper on the cover, being especially careful as you go around the rounded corners. Insert the creased recycled paper into the creased cereal box cover.


Now it is time to bind it. Lay the cover and paper flat. You can either hand sew it using an awl and waxed linen thread or quickly run it through your sewing machine. I've done it both ways, but I used my sewing machine with this one because it was late in the evening, and I wanted results. If you do use a machine, you might want to use a sturdy needle, like a denim needle, to slowly stitch the paper onto the cereal box cover. In either case, be careful to follow the center fold.


I covered the outside edge with book binding tape. You don't have to do this, though. I tend to leave the binding exposed when the book is one piece of material, but since I used two different pieces of paper to cover the front and back, I decided it would be nice to cover the binding (where the two pieces of paper meet).


xo e

trim the wall. trim it all.

I'm so not done playing with felt and yarn and beads. I was laughing at myself this morning because I really needed to fold more laundry (still folding) and meet some deadlines, but I straight up didn't want to clean up my beads. I paused, recognized that it really is so hard to stop in the middle, and tidied up so I could continue on with my day.

A few months ago, Chick learned to draw five point stars and since then she has been drawing them every chance she gets. I find little five point stars on the steamy windows after I shower and on envelopes waiting to be recycled. It is totally her new tag, and I find them everywhere. One afternoon last week, I asked Chick to use her Sharpie to draw stars on the back of some wool felt. I cut them out - mostly staying true to her designs, but enlarging them a bit, and I've been using them for ornaments and decorations. You'll notice that the backs of the stars have her Sharpie star lines on them.
This project is a cross between the beaded strings in this post and this.

One tip just in case you decide to make this project at home. I used a needlepoint needle to thread the beads and the felt shapes. A needlepoint needle is super big and thick with an eye that is big enough for yarn. In order to get the needle through the cereal box, felt, and fabric, I first used an embroidery needle to puncture the fabric, thus creating a tiny hole, which allowed my big fat needlepoint needle (with yarn) to go right on through.
The felt bird is backed by dotty fabric (reversible!), and the felt star is backed with cereal box. The next felt star project involves more cereal box and it can be used as a way to give gifties this holiday season. Look for it on Monday.

xo e

stack


Look at my nifty little stack of colorful wooden discs. I painted them the other night in preparation for a new project. I'm super excited to show you what I created, but they aren't quite finished yet.

In the meantime, I'll show you what Tom and I have been working on the past few evenings.


Our computer was on a little unfinished square dinner table which was once in our kitchen many moons ago. It was simple and functional, but didn't allow much room for spreading out papers and such. And, boy, do I like spreading out papers and such. I was thinking of using an old door to create a new work space, but Tom convinced me to use my grandmother's old sewing table. It is an old trestle table with my dad's and aunt's names written in a child's hand on the bottom. It really does make sense to use the table as I create and write since my grandmother, Irene, did her sewing at it years ago. I do feel a magical energy that is seeping out of the wood grain. I feel inspired and at peace just sitting next to it, and when I work at it, I feel kind of nudged to forge ahead.

We used some robin's egg blue spray paint to transform an old metal drawer cabinet. I It feels nice to have a this place to write and organize and think. And, listen to my new music (hello Redbird, my new best friend) that I spent a good part of yesterday absorbed in.

We went for a stroll/bike ride the other evening with Miss Mouse's new push trike which I bought at the local Goodwill for $4.00. I was holding off getting her this sort of thing, but she is wee and has a hard time pedaling her trike. She is so proud zooming on her new plastic chunk of bike. At this point in the bike adventure, Chick decided she wanted a turn, so Mouse pushed her with all of her might. She has a lot of might. Tom did us all some sort of favor by riding Chick's bike home.


The end.

xo e

s i g n s


Here are some little signs made out of recycled box board and fabric scraps. I'm always looking for ways to use up the box board in my recycle bin (cereal, tissue boxes, etc.), so using it to make bright little signs feels perfect. The ones in the picture are for when I am at craft fairs selling my wares, but I think they would also make the sweetest little name signs for doors or shelves. I think I'll make some for our bedroom doors.


Materials: recycled box board, fabric scraps, thread, paper, printer (or rubber stamps), scissors, double stick tape, sewing machine.

To make:

1. Cut out a square of box board
2. Put some double stick tape around the perimeter of one side of the square.
3. Pull fabric scrap tightly around square and secure with the tape.
4. Using a contrasting thread, sew around the perimeter of the square. Trim excess fabric from backside.
5. Print a message onto the brown kraft card stock paper (any color paper will do, but it is best if is card stock weight). Use printer or rubber stamps.
6. Cut the paper w/ message into a square smaller than the fabric covered square. Be sure to leave room for a nice sized border.
7. Place paper square onto the fabric covered box board square. You can put a small piece of double stick tape to secure in place.
8. Sew the paper square onto the fabric square.
9. I don't plan on punching holes in these, but in the past I have been successful with using a hole puncher to make two holes in the top for hanging. The puncher tends to go only part of the way through the fabric, and then I use tiny, sharp scissors to trim up the hole.

xo e

flowers


I came down with a mean old stomach virus late Wednesday night, and with the help of Saltines and tummy tea, I've been slowly recovering since then. Blech! One of the first things I did when I began to feel a bit better this morning (other than kiss the tops of the children's fluffy little heads again and again and again) was create the stamps to make this flower wall board.

I had poppies in mind when I chose the colors. There is something about poppies that makes me feel like everything is going to be okay.

Oh, and we had a flock of about 150 birds land on three trees right outside our house. They were chirping so loud, in unison, that it made us (and our neighbors) peer up at the sky. cheeeeep cheeeeeeeep cheeeeeeeeep. What could be so exciting up in those three trees? Perhaps it was a lunch break on their flight further north? Within twenty minutes they took of in unison and were gone. We were just a brief little stop on their journey to somewhere.

Happy Saturday, everyone.

Love,
E

moleskine collages


A dear friend gave me a three pack of pocket size Moleskine notebooks for my birthday, and, this afternoon, I was inspired to create little fabric, felt, found paper collages on two of the covers. I'm still pondering the third.

I've been so caught up in stamp carving and block prints that I forgot how much I love to sew onto paper. I spent some time gathering felt, fabric, and paper scraps, created two little sketches, and channeled my deep desire for all things green into the two wee collages. This is a nice little project that ends up making a sweet little gift for someone you love. Don't be afraid to sew right into the cover, but do think about changing your needle to one that is more thick and sturdy. I used fusible webbing and a bit of fabric glue to attach the larger swatch of fabric. I'm going to put one of them by my bedside to use as a place to write words, sentences, or even little pictures each night. I like that it is small, so there is no pressure to write and write and write. One or two words is sometimes enough.


The neighbors across the street probably think I lost something really important in our front garden because each time I pass it, I pause and search for our first crocus shoot. The kids gather around me, and we use our feet to push leaves to the side in hopes of seeing a tiny little green sprig. As of this afternoon, all we've found are a few stickers, an old drinking straw, lots of dried leaves and vines, and some dirt.

xo e

heart clips


Chick has spent the past year pawing through the brown paper bag filled with the valentines her classmates bestowed upon her last year. She loves the glitter, the hearts, the tissue paper, and the occasional super hero, and she finds satisfaction in attributing each valentine to its creator. So, when I brought up making valentines for her classmates this year, she was determined to get it just right, which meant: hearts and gold glitter. Not silver glitter. It needed to have fancy gold glitter because yellow is her new favorite color. I decided that it might be fun to make something that her friends could use or wear, which led to a big Sunday morning, snuggled in bed, brainstorm session. After lots of heart drawings and ideas, we decided that we'd make gold glittered heart clothespins. We figured that kids can use it to hang stuff in their room or even wear it clipped to a jacket. Chick plans to write each child's name on a paper heart, which will be clipped by the clothespin.

I know this sounds like so much thought and hoopla for one tiny project, but this is the sort of thinking and planning that Chick and I love to do together. She takes it so seriously and is so proud of the final product. We did this project in lots of small steps. In fact, we aren't quite finished making all of them yet. I've found that it has been a nice activity to revisit in quiet moments during the day, like after dinner or while Miss. Mouse naps.

Materials:
paint
kraft paper
scissors
cereal box panel
Mod Podge
glitter
tacky glue (or hot glue gun)
clothespins

1. The first step was painting a big sheet of kraft paper with lots of Valentine's Day colors. Chick did this all by herself, and after becoming one with her art, she ended up looking like one big Valentine. The beautiful streaks and mottled colors ended up giving the hearts a nifty tie dye sort of look.

2. After the paint dried, Chick drew lots of hearts on the back of the painted kraft paper. I love how lopsided and wonky her hearts are. Don't they totally scream "I love you?" Then, I cut up the big piece of paper into smaller squares, and let her cut out each of her hearts. I made a few of my own, too, since I couldn't resist.

3. We used Mod Podge to glue the hearts onto the back of some cereal box panels. I coated the panel with the Mod Podge, put the heart down, and then coated it again. Chick quickly sprinkled/poured gold glitter onto the wet, gluey hearts. You could just use gold sparkle Mod Podge (which would give them a nice even sparkle), but I already had regular Mod Podge and gold glitter in the house. As you can see we have less of a nice, even, thin layer of sparkle situation and more of a thick, crust of sparkle. But, you know, it is authentic to the artist's vision.


4. Once the glitter extravaganza dried, I carefully cut out the hearts being sure to honor the shape of Chick's sweet, imperfect, earnest hearts.


5. Finally, I used some tacky glue (or you can use your best friend - the hot glue gun) to glue the hearts onto the clothespins.

As I type, Chick is frantically writing little notes for pinning with the clothespins. Busy, busy.

Happy weekend to all!

xo e

fabric heart necklaces :: remake

This project began as a garland, but ended up as a necklace. I just couldn't resist slinging the sweet little heart over my neck. So, in the end, it is a little fabric heart necklace perfect for giving to little ones (and big ones) for Valentine's Day. I made these for the girls to wear, but after I threw one around my neck, I was kind of feeling the vibe. I think I might try it with other shapes like birds and stars and apples. Another option is to have your child draw and cut out her or his own heart and use that for the necklace shape.

Materials:
fabric
cereal box panels
sewing machine OR embroidery needle and floss
scissors
hole punch
pen
yarn

How To:

1. You or your child draws a heart shape on the back of your favorite fabric. Cut out the shape, and place it right side up onto a piece of cereal box panel. I didn't affix the fabric to the panel with anything, but you could use a bit of Wonder Under or something to keep it in place.

2. Use your sewing machine, with a thick needle, to sew around the heart. You could also use a big embroidery needle and floss. Once the sewing is completed, trim away the excess cereal box panel.

3. Use the hole punch to make holes in the two tips of the heart. The punch will go through the fabric and cardboard, but you'll probably need to trim a bit of the fabric out of the hole to clean it up.

4. There are two ways to string the yarn, which are both pictured below. You can simply thread it through the back and then use a bit of glue to affix the yarn to the back of the heart (so it doesn't show when you turn it over). Or, you can thread pieces of yarn through the holes and then tie big, big, big knots so they don't slip off.

Our friends Rory and little smiley Jack were visiting this morning, and she happened to be wearing the most dreamy, soft, cashmere, sweater. I was dying to see what the necklace would look like against such beauty, and she was kind enough to model it for me. Side note: Rory is a felt loving, lovely who made me the most beautiful felt ball garland. It is hanging in Mouse's room and I will post pictures of it soon.


xo e

g r e e n


Some fabric wall panels in the corner of the guest room/office.

A dried fern on the hard, icy snow.

Phew. I feel like I was a little too much inside my head this week. Lots of little twists and turns led me to spend time circling words and information and what-ifs around and around and around. After some deep breaths, yoga, mucho slow dancing with chick, and a walk in the sun filled afternoon, I feel so much better.

I'll have a Valentine's Day craft or two next week to share.
I wish you a cozy, restful, peaceful weekend.

xo e

art boards

Recently, I spent some time making art out of that bag of scrap wood I picked up a few months ago. Can you tell I have blue skies on my mind? I find myself drawn to working with that bag of scrap wood because of how each board is imperfect with scrapes and color variations.

Fabric covered bird on board painted with sky blue acrylic paint.


Wood bird with acrylic paint. I let the old board shine through as a bird, and painted the negative space in sky blue.


:: Isn't this counting bean bag tutorial from Chez Beeper Bebe super nifty? Her tutorial is clear and simple with bright, cheery photos.

:: Thinking about how lovely the Squam art workshop June session sounds . Dreamy!

:: Loved Maira Kalman's final installment of And the Pursuit of Happiness. It's nice to know there will be a book in October.

xo e